To read the first post in this series: Post 1 in a series of many posts about .net core 2 MVC
This is the first project from the book. It walks you through installing the software needed to develop in .NET Core 2. The first thing I installed was the .NET Core 2.0 SDK. Then Visual Studio 2017 Community edition which I really like BTW. When installing Visual Studio 2017 you will also need to install “.Net Core cross-platform development” workload. See the below screenshot:
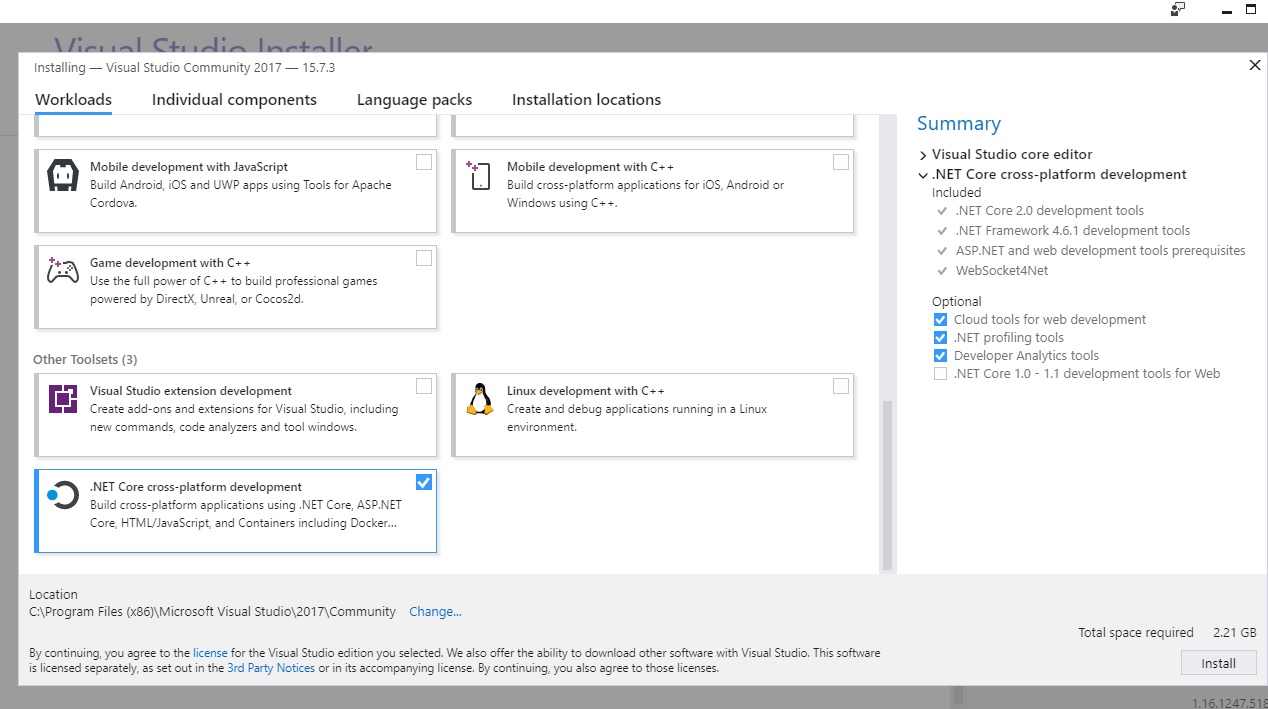 These installs went well and I do like the Visual Studio 2017 installer. You can download Visual Studio Community Edition here and the .net SDK here or you can go straight to downloading the SDK here These go smoothly just follow the installer instructions. Once installed its time to create your first project!
Creating a project in VS 2017 is really easy and thanks to the templates will create everything needed for you. This is great until you know exactly what is needed and can create everything yourself. To create a .NET Core 2 project in VS 2017 Select New –> Project from the File Menu to open the new project dialog. Navigate to Installed–>Visual C#–> Like below:
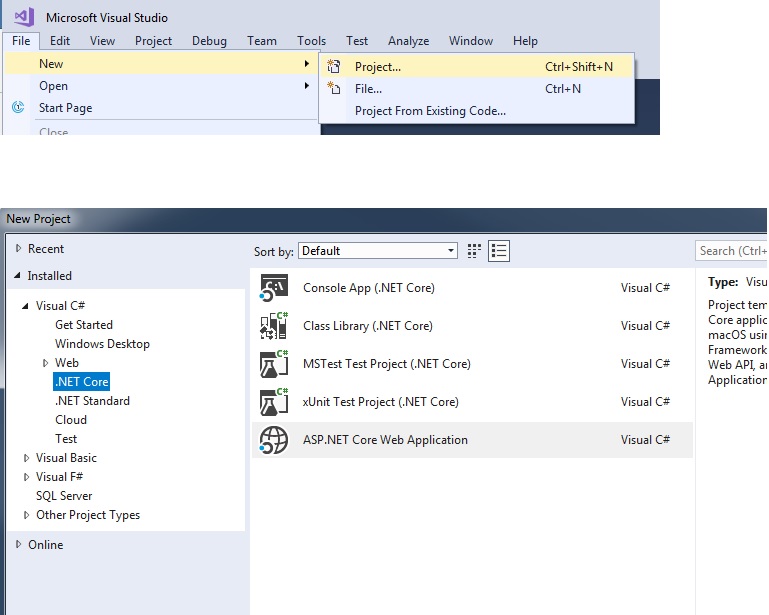
now select ASP.NET Core Web Application
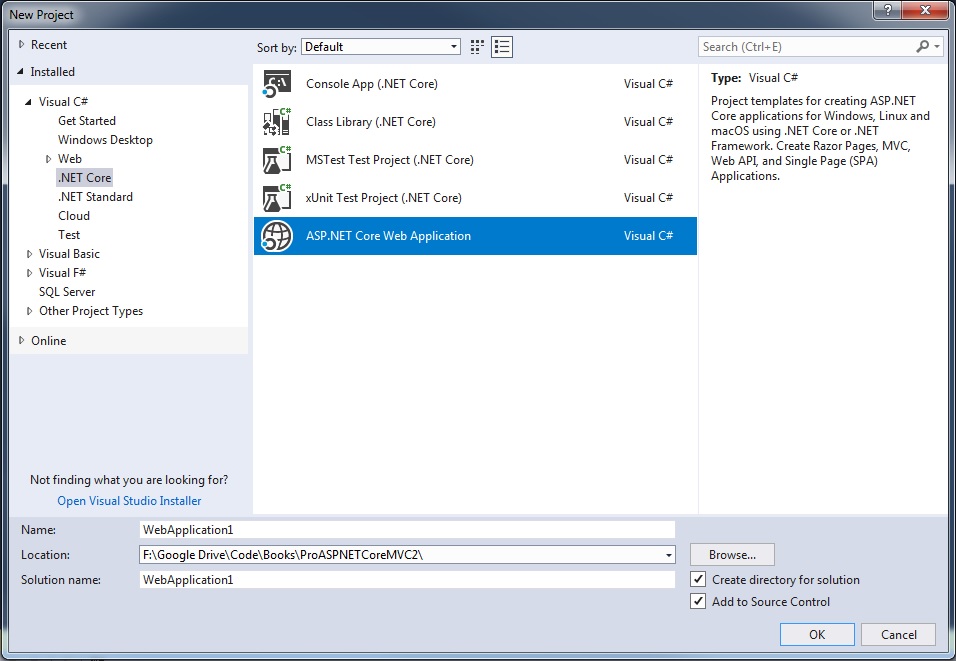
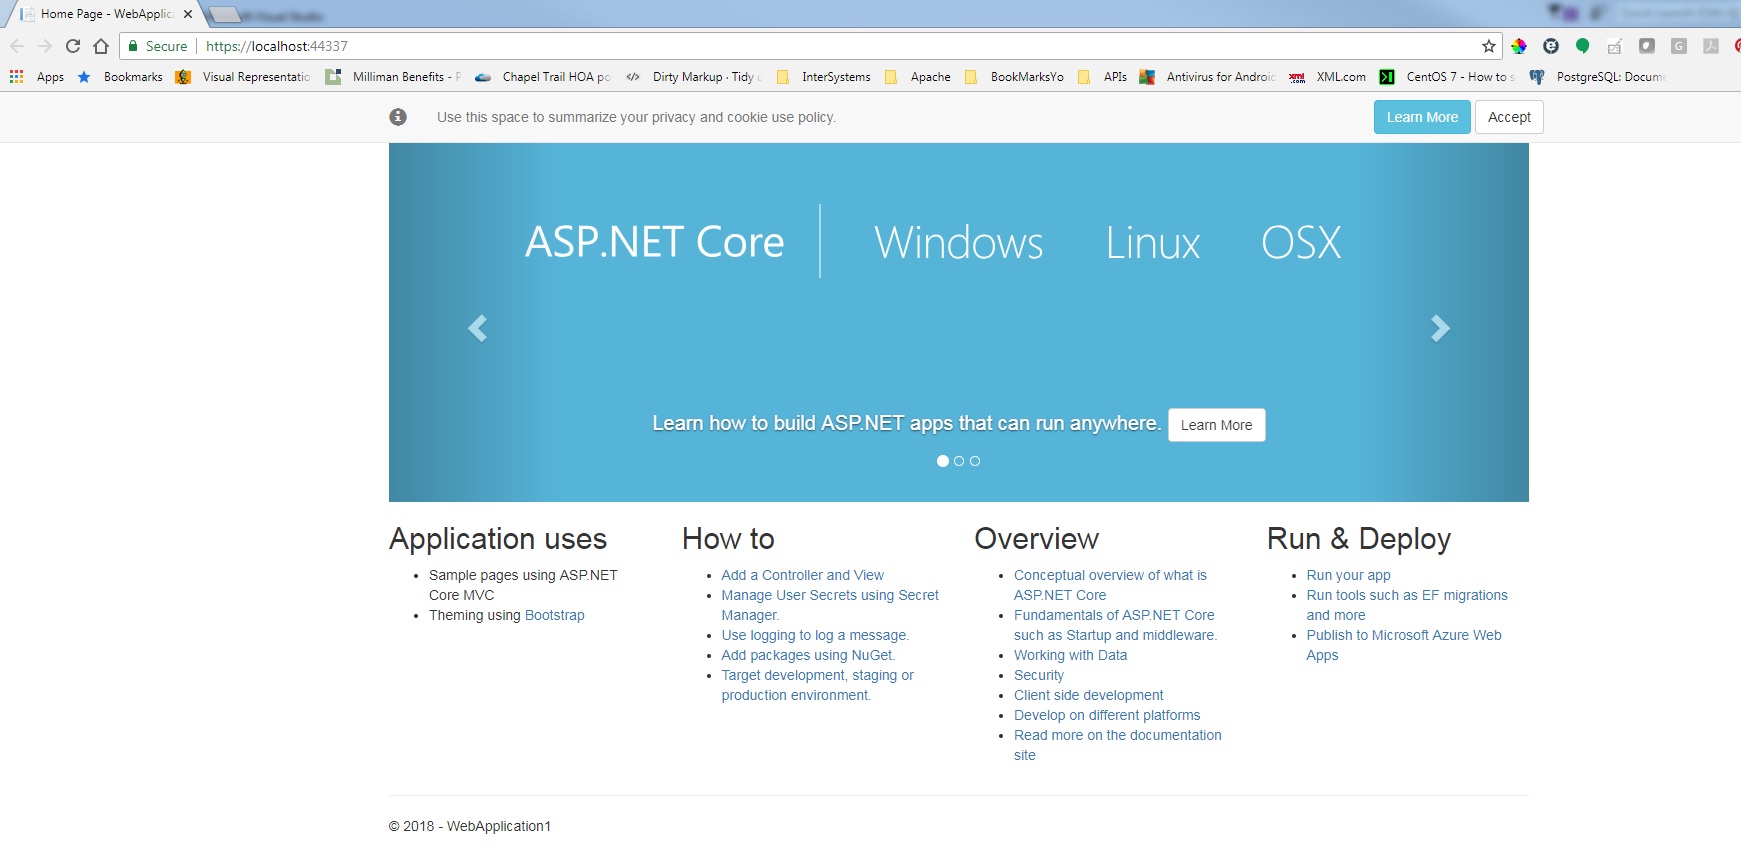
This will create the project using the template so all files are added for you. It basically creates a shell MVC web application for you. Which is great for just starting out but as we learn whats needed we will be able to create an empty project and just add only the files we need.
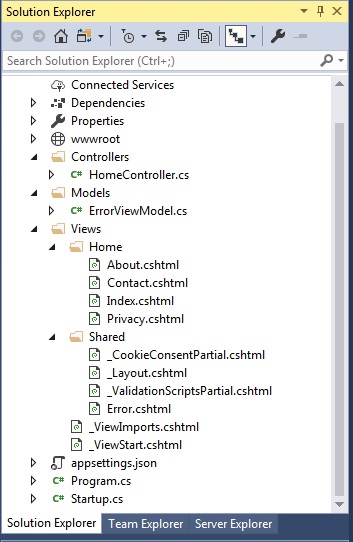
As you can see VS builds the folder structure and creates a basic application that will run. If you build and run the below is what you see by default.
Now let’s look a little deeper into this structure to explain how things work.
Controller
In MVC pattern, incoming requests are handled by controllers. In ASP.NET Core MVC controllers are just C# classes. Typically inheriting from the Microsoft.AspNetCore.Mvc.Controller class, which is the built-in MVC controller base class. Each public method in the controller is known as an action method, meaning you can invoke it from the web via some URL to perform an action. If you notice from the above project view the controllers are contained in the Controllers folder. This is the MVC convention which the Microsoft template follows. Let’s take a look at the default home controller that was created from the template.
using System;
using System.Collections.Generic;
using System.Diagnostics;
using System.Linq;
using System.Threading.Tasks;
using Microsoft.AspNetCore.Mvc;
using WebApplication1.Models;

namespace WebApplication1.Controllers
{
    public class HomeController : Controller
    {
        public IActionResult Index()
        {
            return View();
        }

        public IActionResult About()
        {
            ViewData["Message"] = "Your application description page.";

            return View();
        }

        public IActionResult Contact()
        {
            ViewData["Message"] = "Your contact page.";

            return View();
        }

        public IActionResult Privacy()
        {
            return View();
        }

        [ResponseCache(Duration = 0, Location = ResponseCacheLocation.None, NoStore = true)]
        public IActionResult Error()
        {
            return View(new ErrorViewModel { RequestId = Activity.Current?.Id ?? HttpContext.TraceIdentifier });
        }
    }
}
This is what the default HomeController.cs file looks like now let me change this to show a simple example
I will just show the method I have changed for simplicity.
        public string Index()
        {
            return "Hello World!! from brianbeverage.net";
        }
This changes the Index method to return the string “Hello World!! from brianbeverage.net” If you run this you will notice that the page just displays this text.
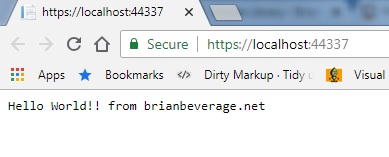 You will notice that VS uses a random port for hosting this application locally. It does have the string of text we expected to see!
How does the URL translate to the controller? It is based on Routes. MVC applications use the ASP.NET routing system, which decides how URL’s map to controllers and actions. When VS creates the project it adds some default routes to get you started.
- /
- /Home
- /Home/Index
That means if I go to any of those locations https://localhost:44337/Home, https://localhost:44337/Home or https://localhost:44337/ then I am hitting the public string Index() method in the HomeController.cs file. This is nice to know when creating a project that is going to use this type of route. If you need another type of routing then you will need to change the configuration to use the routing your application needs.
Views
A view basically serves the HTML from the controller. You can have your controller return a view then in that view, you can have HTML that gets returned to the browser. This can also include dynamic output!
Check out the code below:
        public ViewResult Index()
        {
            return View("HWView");
        }
This is a change to the HomeControllers.cs Index Method. You will notice I changed the return result from a string to a view. It is also a specific view “HWView”. This means that you need to create the view HWView. You can do that by rightclicking on the Home folder and selecting Add–>View

Then just name the view using the View Name box. I named mine HWView since that is what my controller is returning. Now we need to edit our view to return the data we would like returned. In my newly created HWView.cshtml file add the following code.
@{
    Layout = null;
}
<!DOCTYPE html>
<html>
<head>
    <meta name="viewport" content="width=device-width" />
    <title>Index</title>
</head>
<body>
    <div>
        The view says "Hellow World!!"
    </div>
</body>
</html>
This code creates the HTML to show The view says “Hellow World!!”

This is only returning static HTML from the view so this might be useful for a simple webpage or simple static pages within a web application but most web applications will need to return data more dynamically. In order to do that we will need to send data from our controller to our view. This is done using the ViewBag property. This property does not exist until you create it so this is a great way to pass data without having to define classes ahead of time. Here is my example below:

 public ViewResult Index()
        {
            int hour = DateTime.Now.Hour;
            ViewBag.Lunch = hour < 1 ? "before Lunch!" : "after Lunch!";
            return View("HWView");
        }
@{
    Layout = null;
}
<!DOCTYPE html>
<html>
<head>
    <meta name="viewport" content="width=device-width" />
    <title>Index</title>
</head>
<body>
    <div>
        You are viewing this @ViewBag.Lunch
    </div>
</body>
</html>
The first code there is the HomeController.cs file you notice that I added the ViewBag.Lunch property and set it depending on the hour. Then we return the View(“HWView”). Looking in HWView.cshtml file we see that we just reference the ViewBag.Lunch property. What is happening here is when the index method returns the View(“HWView”) it is passed to Razor view engine to parse the content of the file. Razor looks for expressions like the @ViewBag.Lunch property that was assigned in the controller. There’s is nothing special about the Lunch property name. It could have been named anything as long as you use the same name in the controller and view. This is just a nice way to pass data from the controller to the view without needing to create a class.
Models
“In MVC the M stands for Model, and its the most important part of the application. The model is the representation of the real-world objects, processes, and rules that define the subject, known as the Domain, of the application. The model, often referred to as the domain model, contains the C# objects that make up the universe of the application and the methods that manipulate them. The views and controllers expose the domain to the clients in a consistent manner, and a well-designed MVC application starts with a well-designed model, which is then the focal point as controllers and views are added. The MVC convention is that the classes that make up a model are placed inside a folder called models, which visual studio creates automatically when you use the Web Application (Model-View-Controller) template.”
I created a new project called AutoApp it looks like this:

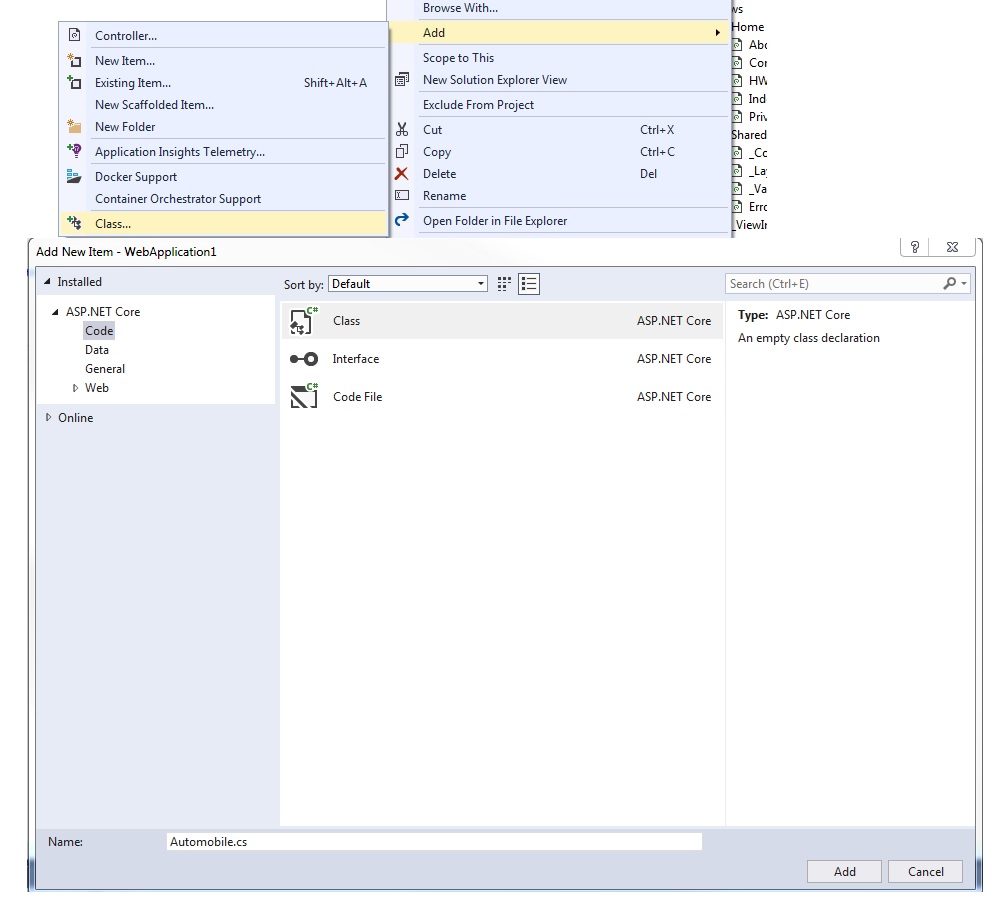
Now let’s create a model to use in our application. I will be creating an application to keep track of vehicles since I love cars! To create the class just right click on the folder Models and select Add –> Class
 Now we need to add properties to this class. This is how I have defined my class:
using System;
using System.Collections.Generic;
using System.Linq;
using System.Threading.Tasks;

namespace AutoTracking.Models
{
    public class Automobile
    {
        public string Make { get; set; }
        public string Model { get; set; }
        public string Year { get; set; }
        public bool? Stock { get; set; }
    }
}
This will be the properties needed to track a list of automobiles that we own. If you are a car enthusiast like myself this list could be long! We can also just pretend like we own these autos for the sake of this sample. Now that we have the new project with the Automobile.cs class file in the next post we will use this class and develop a form that uses a strongly typed view
quotes in this post come from the book Pro ASP.NET Core MVC 2. That is the book that I am going through to learn ASP.Net Core 2 MVC.