As I talked about in the post Prusa I3 MK3 Purchased, I have ordered a 3D printer. Now, I’ll need a place to put it once I have built it. I looked around for a table that was in the 24″ wide X 72″ long range, and let’s just say, they are not cheap. Granted, I was looking at more hardwood tables than IKEA style. My next thought was that I should be able to build something that looks decent, and matches the size I want to add an L to my desk setup. I decided to go with a simple pine table since it is more cost-effective than Oak. I just really wanted something that I could stain to match the desk and sit at the end to make the L shape which would give me lots more space! That would put the 3D printer close by and allow room to keep the regular printer near as well as allow me to have space for my dedicated FPV Linux laptop. That began me looking at some lumber and how to design the table. I knew from the shelf / built-in desktop I built my wife that Lowes has a prefabricated table top that meets my needs. Thus began the process in my head of how to use that tabletop to create a decent table. I cannot find the board that I bought on the Lowes website but it measures 1″ x 20″ x 6′ and its an edge glued pine project board. This is really similar it might be the one I got… the price is close. Below is the list of parts:
1 – 20 inch wide by 6 ft long pine board
4 – Prefab Pine legs
2 – 1-inch x 2-inch x 8 ft finished pine board
Total lumber cost: $122.50 not bad for that size of a table. I already had the stain and staples to build the table so I am not counting that in the cost. I would estimate that’s only about another $20.00.
These are the items I already had but work really well for all of my woodworking projects.
Bostitch 3 – Tool and Compressor Combo Kit
You do not have to have a saw this nice but I was doing a lot of trim work around the house and wanted a saw that could handle anything so the below is what I ended up purchasing.
Dewalt DWS780 12 – inch Double Bevel sliding compound miter saw
Here are some photos of the build along the way.
I started by deciding which side of the top would be facing up. I then marked 3″ pencil marks around the edge to allow a chalk line to be snapped. The below picture shows this chalk line and one of the legs that I will be using. The chalk line gave me a nice straight edge to line up the 1″x2″ trim around the bottom of the tabletop.
I used the clamp to hold the 1″x2″ on the chalk line while I stapled it to the tabletop. I only needed to hold one end securely then I could use my hand to line up along the other end as I stapled it to the tabletop.
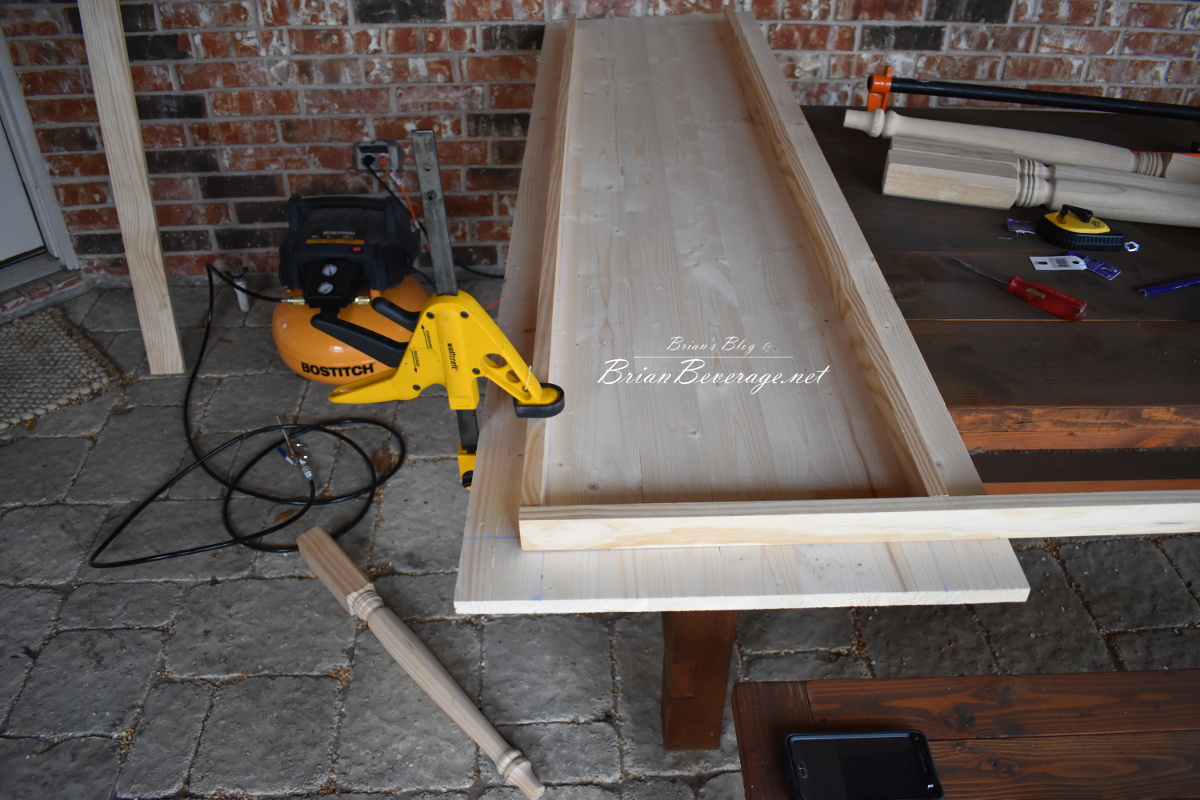
This is what the finished top being trimmed looks like. You will notice that I used the chalk line as the inside diameter of the trim. I probably would have gone from a 3″ in-set to a 2″ in-set just to make the trim more visible under the edge of the table but I was not about to start over. LOL

 Now I decided instead of using hardware to attach the legs I would just build a little frame around the top of the leg. You can see from the image below that I just stapled cut 1″x2″ extra board to the leg and top. This was a sturdy mount since all it will be holding is a couple printers. I will have to update after they have been sitting on there running for a bit to make certain it does not wiggle anything lose.
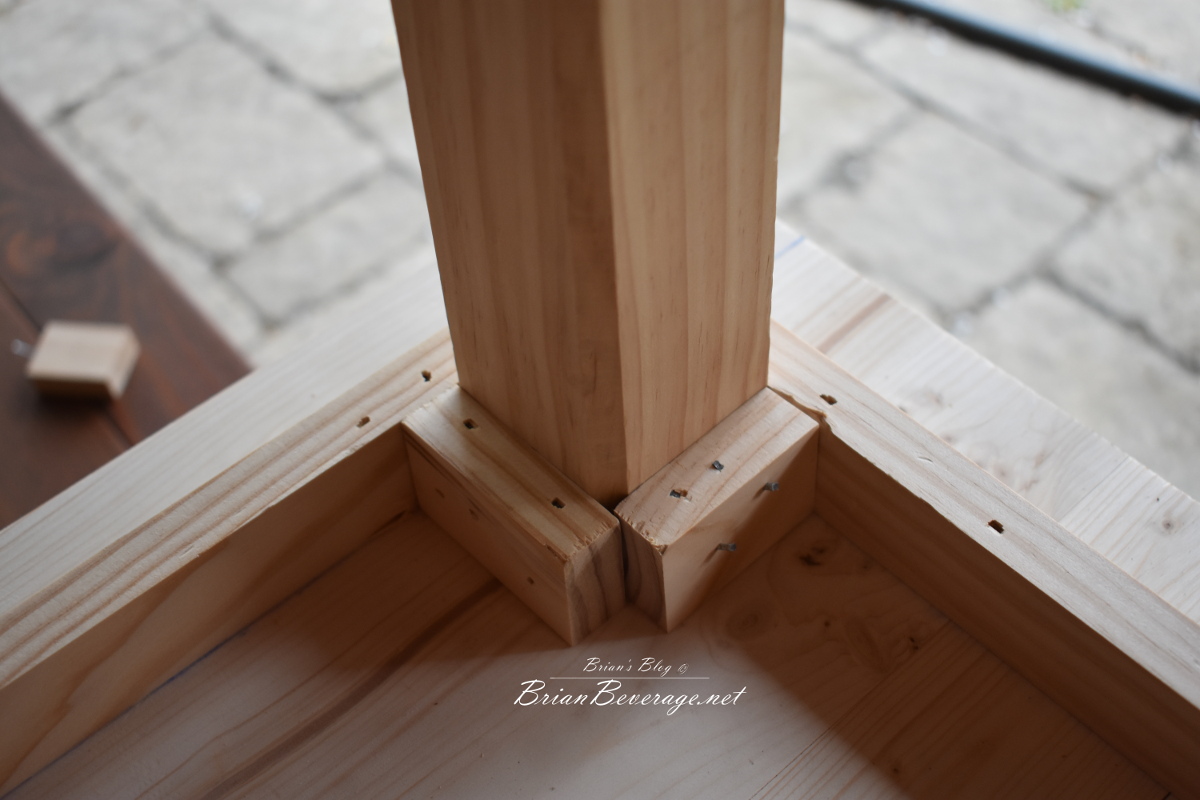 I should also explain how I confirmed the legs were level. I placed both legs in position then used my level across the end of the legs. I just set it up on the tops of the leg and confirmed they were level before starting to staple in the leg. I then cut the 1″x2″ like above clamped in a part then stapled it in. I did the same process for both pieces you see above. This made a sturdy connection. I would like to note that the top was a little warped but it still sits fine on the floor in my office. I just noticed while attaching the legs using the above-described process.
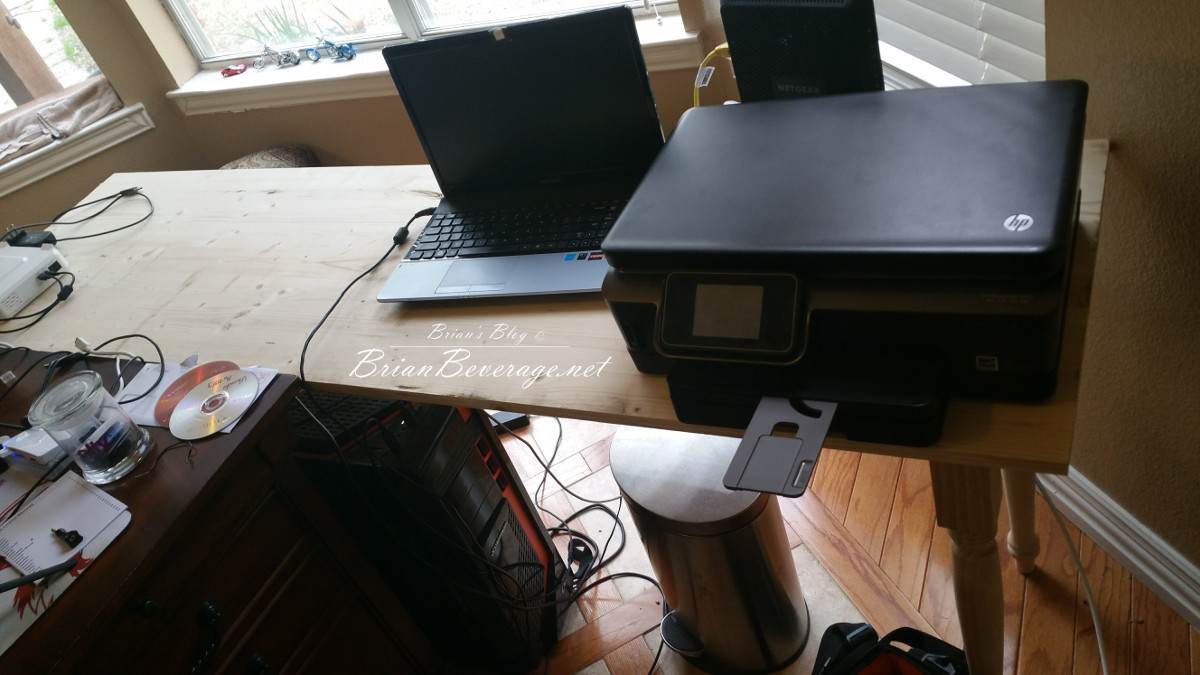
This is the table sitting in my office in position before it gets stained and polyurethane applied. I think it turned out really nice and is the perfect size to fill the space I was wanting to fill. Once it is stained I will post an updated picture. I am certain that blog will also have a 3D printer sitting on it instead of just the regular printer. 🙂
I hope this just goes to show you that its possible with just a few pieces of lumber, and a little imagination, some decent furniture can be built! Until the next post, keep on using that creative mind to make things! 🙂